If you're working on your home's plumbing vent, replacing the roof, or conducting an annual inspection, you may need to repair or replace the roof flashing.
Many homeowners overlook the importance of roof flashing in maintaining their homes. However, this critical component is important in preventing leaks and protecting your property from water damage. Knowing how to install flashing correctly is essential.
What to Consider Before Installing a Roof Flashing
For a successful roof flashing installation, follow these professional tips, ensuring both effectiveness and safety. Selecting the right materials and executing each step with precision is crucial for mastering the attachment of flashing and achieving a leak-free roof.
- Pitch (or angle) of the roof: If the home's roof is flat, you must use a flashing that accommodates a 90-degree pipe angle. However, a pitched roof requires an angled flashing and is designed to work with the degree of the pitch.
- Location and climate: To retain its watertight seal, the flashing must handle the roof's expansion and contraction through various temperatures. It must also withstand constant exposure to UV rays without becoming brittle. If the home is near a saltwater source, the flashing should feature a galvanized base or a coating to help prevent corrosion.
- Vent-pipe diameter: To ensure a watertight seal, choose a flashing with a properly sized opening for the pipe size exiting the roof. Never try to slide a smaller flashing collar over a larger pipe because it will cause fatigue and failure in the collar. Never install a larger collar over a smaller pipe using a sealant to fill the void. Any sizing miscalculations will lead to leaks within the home or building.
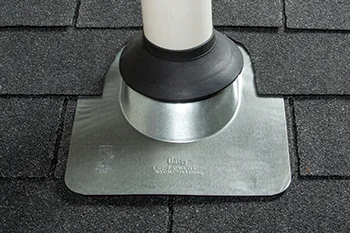
- Type: Oatey offers various types of flashing to suit different roofing and utility needs. Standard Flashings are made from aluminum, thermoplastic, or galvanized materials and feature self-sealing collars that fit over pipes without caulking, accommodating various pipe sizes. High-Rise® Flashings are designed for shingled roofs with pitches up to 60 degrees, while Sideflash™ Vertical Flashings seal around utility penetrations in walls, fitting pipe sizes from ½-inch to 6 inches. Lastly, Master Flash® Flashings are tailored for metal roofs, customizable for multiple pipe diameters, and have a 20-year warranty.

- Specialty applications: Some homes will require specialty flashings, such as side flashings. These can be used for plumbing, electrical, and HVAC pipes that exit the side of the house –– rather than through the roof –– or over solar posts. In applications where the integrity of the flashing base is in good shape, but the rubber rain collar is not, Oatey's Rain Collar for No-Calk® Roof Flashings can easily be installed over the existing rain collar to restore its seal.

Step-by-Step Guide: How to Install a Roof Flashing
Properly installing flashing on your roof is crucial for preventing leaks and water damage. Follow these steps to secure your roof effectively.

How to Attach Flashing to a Roof
Step 1: Prepare the roof surface for flashing installation
Before installing any flashing on an unfinished roof, clean off all debris and apply a waterproof layer of felt or tar to the roof's underlayment (if one isn't already in place). For homes with completed roofs, you'll need to pry up the roofing nails securing the old flashing. Carefully lift the shingles above the flashing to remove it from over the pipe.
The process for installing flashing on a wall is similar. First, ensure the wall surface is clean and free of debris. Then, position the flashing against the wall, overlapping it with the shingles at the top.
Apply a waterproof sealant where the flashing meets the wall to prevent leaks. Then, follow the same steps to secure it properly, ensuring it directs water away from the structure.
Step 2: Shingle installation – bottom to peak
In a new-roof installation, install the shingles starting at the bottom of the roof and move upward to the peak, row by row. Each row should overlap the previous one so water cannot penetrate below or between the shingles.
Step 3: Chamfer the pipe end before flashing installation
As you get close to where the pipe goes through, give the end of the pipe a sloped edge. Clean the edge and the area around the pipe.
Step 4: Apply the flashing
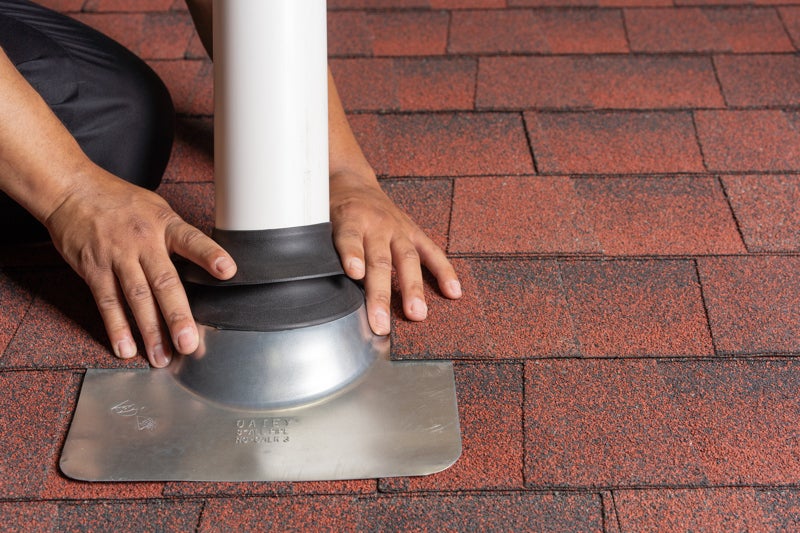
Slide the flashing over the chamfered (sloped) pipe end, positioning it flush against the waterproof underlayment and shingles.
Step 5: Secure the flashing
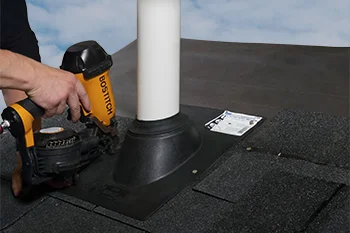
Secure the flashing to the roof using roofing nails concealed under the next few rows of shingles. This will keep the roofing system leak-free. Next, install shingles in rows to the top of the roof.
Step 6: Test the flashing
Once the shingles are fully installed, perform a water test. Douse the roof above the pipe vent for 15 minutes. Then, check the attic space where the pipe exits the home to see if there are any water leaks. If no leaks are visible, the flashing is watertight, and the job is complete.
For further instructions on properly installing roof flashings, watch our video tutorial below:
How to Install a Side Flashing
When it comes to installing flashing on a wall, flashing against siding, flashing under existing siding, or flashing on a side of a house, it's important to understand the proper technique for installing side flashing. Below is the step-by-step process:
1. Tear away the rubber collar to the size of the pipe used (if necessary).
2. Slide flashing over the pipe and secure to the exterior wall.
3. Install house wrap or building paper over the flashing.
4. Install the final exterior material over the home or building.
With the exception of the Master Flash and Retro-Master Flash, all Oatey flashings have a one-year warranty from the date of manufacture. However, due to varying roof life spans and potentially adverse conditions, such as extreme heat, extreme cold, and hail, flashings cannot be guaranteed for the roof’s life.
Ultimately, installing flashings and proper sealants protects a roof from water damage and unnecessary wear and tear. It's imperative that the flashing expand and contract with the outside elements and divert water off the roof. A proper roofing contractor can check for damage or potential problem areas.
If you want to learn more about roof flashing options, check out our blog post,"What is a Roof Flashing?"
